Introduction

Welcome, budding plumbers and DIY enthusiasts! Cutting PVC pipe might seem like a straightforward task, but there’s more to it than meets the eye. Whether you’re working on a home project or diving into the world of plumbing, understanding how to cut PVC pipe accurately is crucial. In this guide, we’ll delve deep into the art of cutting PVC, ensuring that your PVC project is both leak-free and professional-looking.
Importance of Cutting PVC Pipe Accurately for Leak-Free Installations
Cutting PVC pipe with precision is not just about aesthetics; it’s about functionality. An inaccurately cut PVC pipe can lead to:
- Leaks: Even a small misalignment can cause water to seep through, leading to potential damage.
- Wasted Materials: Incorrect cuts mean wasted PVC pipes, which can be costly over time.
- Compromised Structural Integrity: A poorly cut pipe might not fit well with PVC fittings, leading to a weaker structure.
Remember, the key to a successful PVC project lies in the details. So, always measure twice and cut once!
Overview of the Various Methods Available
There are several methods to cut a PVC pipe, each with its own set of advantages. Let’s explore them:
- Plastic Pipe Cutter: This specialized tool is perfect for making quick and clean cuts. There are different types of PVC pipe cutters, such as the shears pipe cutter, ratchet pipe cutter, and C-shaped pipe cutter. They’re ideal for smaller PVC projects.
- Handsaw: A common tool found in most households, a handsaw can cut through PVC pipes with ease. However, ensure the saw has the right teeth-per-inch to avoid rough edges and PVC shavings.

- Electric Miter Saw: For larger projects or when precision is paramount, an electric miter saw is your best friend. It provides clean, straight cuts, especially when dealing with thicker PVC pipes.
- Hacksaw: Another common tool, the hacksaw is versatile but requires a steady hand. Remember to clean up any PVC shavings after cutting.
- Rotating Pipe Cutter: This tool is rotated around the pipe to make a cut. It’s especially useful for tight spaces.
- Ratcheting Pipe Cutter: With a squeezing motion, this cutter makes the job easy and is perfect for those who might not have as much hand strength.
Understanding PVC Pipe
Before diving into the cutting techniques, it’s essential to understand what you’re working with. PVC pipes are more than just plastic tubes; they’re a staple in the world of plumbing and DIY projects. Let’s delve deeper.
What is PVC?

PVC stands for polyvinyl chloride, a widely used plastic.
PVC is a versatile material known for its durability, cost-effectiveness, and resistance to chemicals. It’s a favorite among plumbers and DIY enthusiasts alike. When you embark on a PVC project, you’re working with one of the most reliable building materials available.
Common uses: cold water, irrigation, main gas lines, and drain-waste vents.
From garden irrigation systems to main gas lines, PVC pipes have a myriad of applications. Their resistance to corrosion and chemical reactions makes them ideal for transporting water and other fluids. Plus, their smooth interior reduces the risk of blockages in drain-waste vents.
Differentiating between PVC, CPVC, and ABS

With so many types of plastic pipes on the market, it’s easy to get confused. Let’s break down the differences:
PVC: Suitable for cold water systems; can become brittle with sun exposure.
PVC pipes are primarily used for cold water systems. They’re durable and can last for years. However, prolonged exposure to sunlight can make them brittle. If you’re using PVC outdoors, consider painting or shielding them from direct sunlight.
CPVC: Suitable for both hot and cold water; can handle temperatures up to 200°F.
CPVC (Chlorinated Polyvinyl Chloride) is a step up from PVC. It can handle both hot and cold water, making it perfect for home plumbing systems. Its ability to withstand higher temperatures means you won’t have to worry about it warping or melting.
ABS: Used for drain-waste-vent applications; withstands higher-temperature drain water.
ABS (Acrylonitrile Butadiene Styrene) is black and primarily used for drain-waste-vent applications. It’s known for its strength and ability to handle higher temperature drain water. However, it’s not as UV-resistant as PVC, so it’s best used indoors or underground.
Top Methods to Cut PVC Pipe

Cutting PVC pipe is an art, and like all art, it requires the right tools. Whether you’re a seasoned plumber or a DIY enthusiast, knowing the best method to cut PVC can make your PVC project a breeze. Let’s explore the top methods and their pros and cons.
Plastic Pipe Cutter
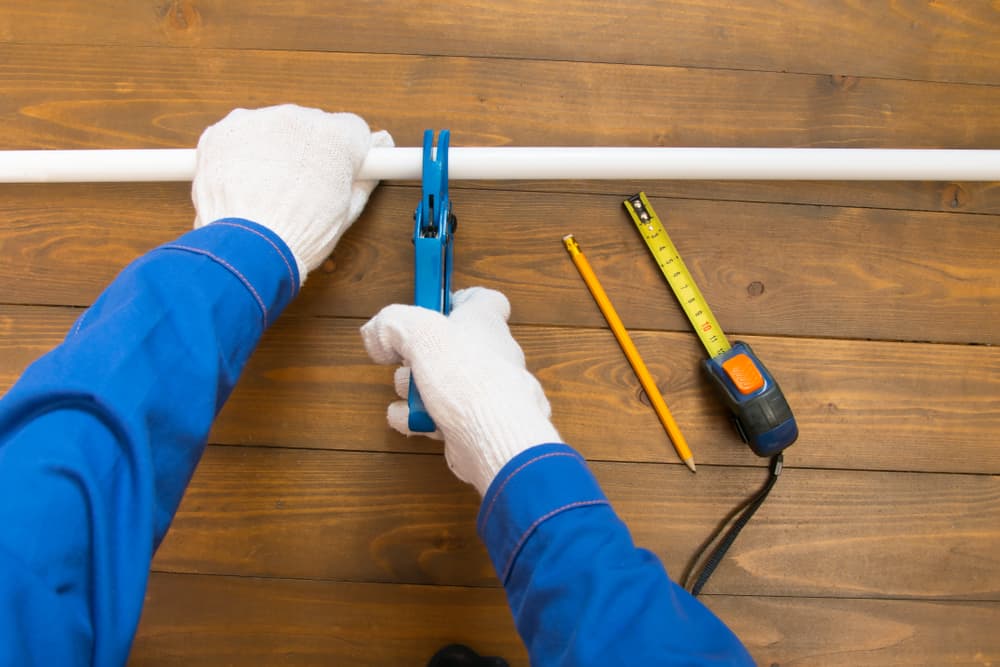
This is a specialized tool designed specifically for cutting PVC and other plastic pipes. It offers a quick and clean cut, ensuring your PVC project looks professional.
Pros: Quiet operation, clean cuts.
Unlike power tools, a plastic pipe cutter operates silently. It’s perfect for those late-night projects when you don’t want to disturb the neighbors. Plus, it gives a clean, burr-free cut, reducing the need for deburring.
Cons: Not suitable for large projects due to hand strain.
For small projects, a plastic pipe cutter is perfect. But if you’re cutting numerous pipes, it can strain your hand. It’s best used for quick cuts here and there.
Types: Rotating and Ratcheting.
- Rotating Pipe Cutter: This tool is rotated around the pipe to make the cut. It’s especially useful for tight spaces.
- Ratcheting Pipe Cutter: With a squeezing motion, this cutter makes the job easy and is perfect for those who might not have as much hand strength.
Hand Saw
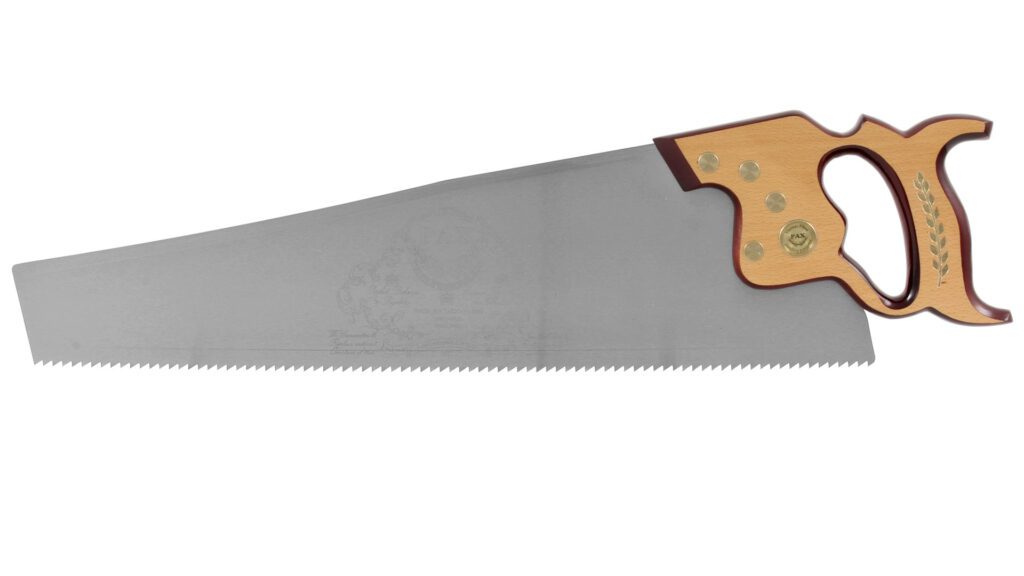
A hand saw is a versatile tool that can be used for various tasks, including cutting PVC pipes.
Pros: Commonly available, flexible usage.
Almost every household has a hand saw. It’s flexible and can be used for other tasks besides cutting PVC.
Cons: Can be messy, and requires deburring.
Using a hand saw can produce PVC shavings, which can be messy. After cutting, you’ll need to deburr the edges to ensure a smooth finish.
Electric Miter Saw
For those who want precision and speed, the electric miter saw is the way to go.
Pros: Fast and accurate, suitable for bulk cutting.
An electric miter saw can cut through PVC pipes like butter. It’s especially useful for bulk cutting, ensuring all your pipes are the same length.
Cons: Requires caution, and potential safety hazards.
Power tools come with risks. Always read the user manual and wear the necessary personal protective equipment. Ensure you’re in a well-ventilated area and keep the workspace clean to avoid accidents.
Step-by-Step Guide to Cutting PVC
Cutting PVC pipe accurately is both an art and a science. With the right tools and techniques, you can achieve clean, precise cuts every time. Let’s delve into a step-by-step guide on how to cut PVC using various methods.
Using a Hacksaw
The hacksaw is a versatile tool that can be found in most toolboxes. It’s perfect for making quick cuts on PVC pipes, especially if you don’t have specialized tools on hand.
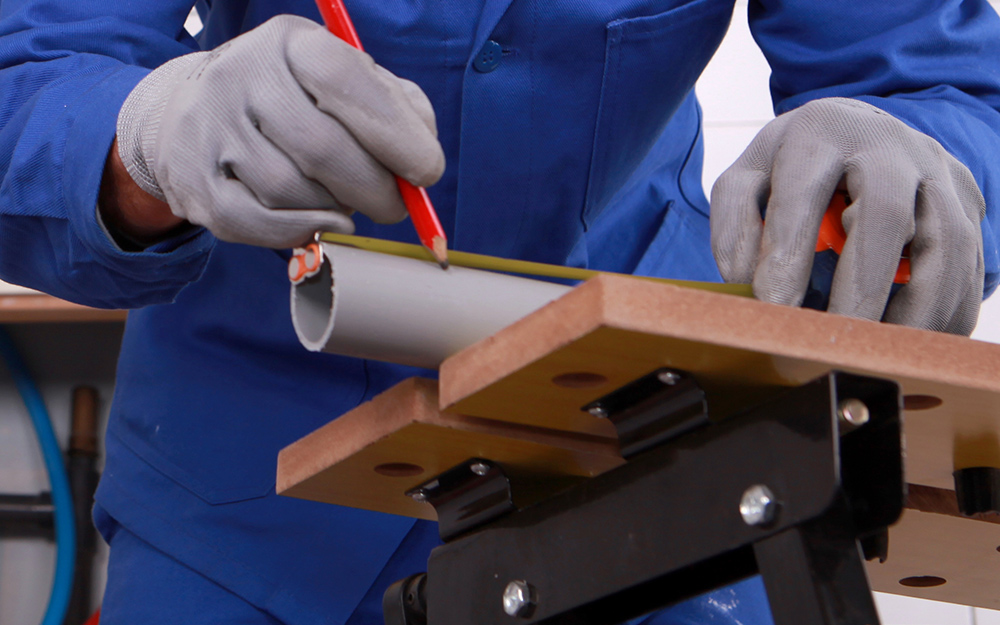
Measuring and marking the cut.
- Determine the length you need for your PVC project.
- Using a measuring tape, measure the required length on the PVC pipe.
- Mark the cutting point with a permanent marker. This will serve as your guide when cutting.
Securing the pipe using a vise or clamp.
- To ensure a straight cut, it’s essential to secure the PVC pipe.
- Use a vise or clamp to hold the pipe in place. Ensure it’s tight enough to prevent the pipe from moving but not so tight that it deforms the pipe.
Cutting technique: Slowly draw the hacksaw blade back and forth.
- Place the hacksaw blade on the marked point.
- Apply gentle pressure and slowly draw the blade back and forth.
- Continue sawing until you’ve cut through the PVC pipe.
- Clean up any PVC shavings and deburr the edges using a deburring tool or sandpaper.
Using Scissor or Ratchet-Type Cutters
These specialized PVC pipe cutters are designed for ease of use and precision.
Proper alignment and rotation.
- Open the jaws of the cutter and place the PVC pipe between them.
- Ensure the cutting blade aligns with the marked point on the pipe.
- Slowly close the jaws, ensuring the pipe remains in place.
Ensuring a straight cut.
- Apply steady pressure to the handles of the cutter.
- For ratchet-type cutters, you’ll hear a clicking sound as you squeeze. Continue squeezing until the cut is complete.
- For scissor-type cutters, simply squeeze the handles together until the pipe is cut.
Using a Miter Saw
The electric miter saw is perfect for bulk cutting and ensures a straight, clean cut every time.
Safety precautions: Use ear and eye protection.
Safety first! Always wear protective eyewear and ear protection when using power tools.
Ensure the miter saw is on a stable surface and that you have a clear workspace.
Achieving a clean cut using a composite material or plastic circular saw blade.
- Mark the PVC pipe where you want to make the cut.
- Secure the PVC pipe on the miter saw’s platform.
- Use a composite material or plastic circular saw blade for the best results.
- Turn on the saw and slowly lower the blade onto the marked point on the PVC pipe.
Once the cut is complete, turn off the saw and wait for the blade to stop completely before removing the pipe.
Post-Cutting Procedures

After you’ve successfully cut your PVC pipe, the job isn’t over just yet. Proper post-cutting procedures ensure that your PVC project is not only aesthetically pleasing but also functional and long-lasting. Let’s explore the essential steps you need to take after cutting your PVC pipe.
Deburring and Cleaning the Pipe
Once you’ve made your cut, you’ll often find rough edges and shavings clinging to the pipe. These can interfere with the fitting process and even lead to leaks if not addressed.
Use a deburring tool or utility knife to remove shavings.
- Hold the PVC pipe firmly in one hand.
- With a deburring tool or utility knife, gently scrape the inner and outer edges of the pipe to remove any shavings or burrs.
- Rotate the pipe as you go to ensure an even and smooth finish.
Ensure a smooth edge for better connection during gluing.
A smooth edge ensures that the PVC glue or cement bonds properly, preventing any potential leaks in your PVC project.
Dry-fitting before Final Installation
Before you make any permanent connections, it’s always a good idea to dry-fit your PVC pipes and fittings. This step ensures that everything aligns correctly.
Check for proper alignment and fit.
- Insert the PVC pipe into the fitting without using any glue.
- Ensure that the pipe goes in smoothly and sits snugly within the fitting.
- Check for any gaps or misalignments. If everything fits well, you’re ready for the next step.
Applying Primer and Cement
To ensure a watertight seal, you’ll need to apply both a primer and cement to the PVC pipe and fitting.
Use a dauber for even application.
- Start by cleaning the pipe and fitting it with PVC cleaner to remove any dirt or grease.
- Apply the PVC primer using a dauber in an even layer on both the pipe and the inside of the fitting. This step prepares the PVC for the cement.
- Once the primer is dry, apply the PVC cement in the same manner. Ensure you cover the entire surface.
Hold the connected pipes for 30 seconds to ensure a secure bond.
- After applying the cement, immediately insert the PVC pipe into the fitting, pushing it in as far as it will go.
- Hold the connection firmly for about 30 seconds to ensure a secure bond.
- Allow the cement to cure for the recommended time (usually several hours) before testing or using the PVC project.
Safety Tips
Safety should always be your top priority when working with PVC pipes and tools. Here are some essential safety tips to keep in mind:
Always secure the pipe before cutting.
Before making any cuts, ensure that the PVC pipe is firmly secured. This can be done using a vise, clamp, or any other tool that can hold the pipe steady. A secured pipe not only ensures a straight cut but also prevents any potential accidents.
Use appropriate safety gear, including gloves and goggles.
Protective gear is a must. Always wear safety goggles to shield your eyes from PVC shavings or any flying debris. Gloves will protect your hands from any sharp edges and give you a better grip on your tools.
Ensure a well-ventilated workspace when using solvents.
When using PVC cleaner, primer, or cement, make sure you’re in a well-ventilated area. These solvents release fumes that can be harmful if inhaled in large amounts. If you start to feel dizzy or lightheaded, step outside for some fresh air.
PVC Pipe Sizes (Schedule 40)
Understanding PVC pipe sizes is crucial for your PVC project. Here’s a quick guide to some of the most common sizes for Schedule 40 PVC pipes:
1/2 inch:
Outer diameter: 0.840 inches
Inner diameter: 0.622 inches
3/4 inch:
Outer diameter: 1.050 inches
Inner diameter: 0.824 inches
1 inch:
Outer diameter: 1.315 inches
Inner diameter: 1.049 inches
Conclusion
Recap of the importance of proper PVC cutting.
Cutting PVC accurately is the foundation of any successful PVC project. A clean, straight cut ensures a tight fit, preventing any potential leaks and ensuring the longevity of your installation.
Encouragement to choose the method that best suits the user’s needs, considering safety and accuracy.
There are multiple methods to cut PVC, each with its advantages and disadvantages. Whether you’re a DIY enthusiast or a professional plumber, always choose the method that you’re most comfortable with. Remember, safety and accuracy should always be your top priorities.
In this guide, we’ve covered everything from understanding PVC to the actual cutting process and post-cutting procedures. With the right tools, techniques, and safety precautions, you can tackle any PVC project with confidence. Here’s to successful plumbing and the many PVC projects ahead!

