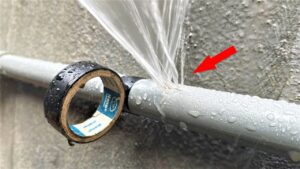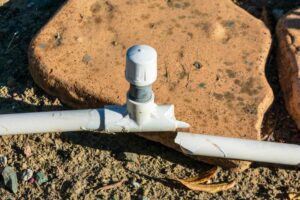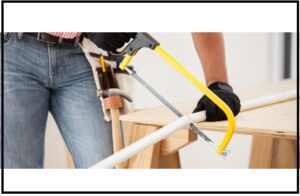
Imagine a sunny day, you’re relaxing in your yard, and suddenly you find yourself surrounded by water. This could be due to a leak or break in the Polyvinyl Chloride (PVC) pipes, commonly used for drainage in yards. While PVC pipes are known for their durability, they can sometimes fail. This guide will provide detailed instructions on how to repair them.
Why PVC Pipe Repair is Crucial
PVC pipes are integral for drainage and waste management. A compromised pipe can lead to water wastage, property damage, and increased utility bills. Timely repairs can save substantial costs and prevent further damage.
Common Causes of PVC Pipe Damage in the Ground

Understanding the culprit behind the damage can prevent future mishaps. Some common causes include:
- Root penetration
- Ground movement
- Improper installation
- Freezing and thawing
- Chemical reactions
Benefits of a Timely Repair
Prompt repairs
- Saves money in the long run.
- Reduces water wastage.
- Preserves your landscape.
- Prevents further damage.
Preparation
Before starting the repair, identify the leak’s location, turn off the water supply, and gather all necessary tools and materials.
Tools and Materials
PVC Primer and Cement
Essential for creating a strong bond between the existing and replacement pipes.
Replacement PVC Pipe
Choose the correct size for a seamless fit.
PVC Couplings
Used to join the new section to the existing pipe.
Hacksaw or Pipe Cutter
For removing the damaged section and sizing the replacement.
Protective Gloves
Protects hands from sharp objects and chemicals.
Trenching Tools
For digging around the damaged area.
Safety Measures
Wearing Protective Gloves
Always wear gloves to avoid injuries and chemical exposure.
Ensuring the Work Area is Dry
A dry workspace prevents slips and ensures the effectiveness of the PVC cement.
Proper Ventilation When Using PVC Cement
PVC cement fumes can be harmful. Work in a well-ventilated area to avoid inhalation.
Avoiding Contact with Eyes
Prevent eye contact with chemicals. If contact occurs, rinse immediately with water.
Step-by-Step Guide to Repair PVC Pipe in the Ground
Step 1. Locating the Damage
Inspecting for Visible Leaks
Check for visible water seepage from the pipe.
Identifying Wet Spots on the Ground
Unusual wet spots can indicate underground leaks.
Using Leak Detection Equipment
For uncertain leak locations, use specialized equipment or seek professional assistance.
Step 2. Excavating the Damaged Area
Digging Carefully to Avoid Further Damage
Gently excavate to prevent additional damage to the pipe or surrounding utilities.
Removing Soil Around the Damaged Pipe
Clear enough soil to provide a comfortable workspace.
Ensuring a Clear Workspace
A spacious and clear workspace ensures efficiency and safety.
Step 3. Cutting Out the Damaged Section

Using a Hacksaw or Pipe Cutter
Choose the appropriate tool for a clean cut.
Making Clean and Straight Cuts
Straight cuts ensure a perfect fit for the replacement section.
Ensuring a Gap for the Replacement Section
Leave adequate space for the new section.
Step 4. Preparing the Replacement Section
Measuring and Cutting the New PVC Pipe
Size the new pipe to fit perfectly in the gap.
Applying PVC Primer to Both Ends
Primer prepares the pipe for a strong bond.
Letting the Primer Dry
Wait for the primer to dry thoroughly before proceeding.
Step 5. Installing the Replacement Section
Applying PVC Cement to the Pipe and Couplings
Ensure a watertight seal with proper application.

Joining the Replacement Section to the Original Pipe
Fit the new section and hold until the cement sets.
Holding Firmly Until the Cement Sets
This ensures a robust bond.
Step 6. Testing the Repair
Reintroducing Water Flow
Turn on the water and monitor the repaired section.
Checking for Leaks
Ensure the repair is watertight.
Step 7. Refilling the Excavated Area
Placing the Soil Back Carefully
Refill without damaging the repair.
Ensuring the Ground is Level
A level ground prevents water pooling and potential future damage.
Post-Repair Tips
Monitoring the Repaired Section Regularly
Regular checks ensure the repair’s longevity.
Avoiding Heavy Machinery Over the Repair
Area Protect the repair from potential damage.
Maintaining the PVC Pipeline Regularly
Routine maintenance ensures efficient functioning and longevity.
Seeking Professional Advice if Unsure.
When in doubt, always consult with a plumbing expert.
Conclusion
The Importance of Timely Repair
Early repairs prevent extensive damage and save costs.
Safety Considerations
Safety should always be a priority during repairs.
Benefits of Regular Maintenance
Routine checks and maintenance ensure the system’s efficiency and longevity.

