Introduction
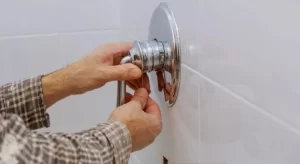
Ah, the art of shower handle removal! If you’ve ever found yourself staring at your shower faucet, wondering how to remove that pesky handle without any visible screws, you’re not alone. The evolution of shower handle designs has brought about a myriad of handle types, from the classic Moen shower handle to more modern designs. But with these advancements comes the challenge of how to remove shower handle without screws. Fear not, dear reader, for this guide will walk you through the process step by step, ensuring you can tackle this task with confidence.
The Evolution of Shower Handle Designs
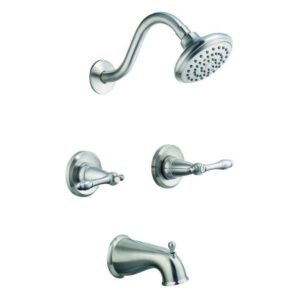
Shower handle designs have come a long way. From the traditional knob handles to the sleek lever-style handles, the variety is vast. Some popular handle types include:
- Knob Handles
- Lever Handles
- Cross Handles
Each design has its unique mechanism holding it in place. For instance, the old Moen shower handle might differ from a modern single-unit Moen shower in its uninstalling process. It’s essential to check the brand and identify the specific design before diving into the removal.
The Challenge of Removing Handles Without Visible Screws
The absence of visible screws in shower faucets can be puzzling. But here’s a secret: they’re often hidden behind a button or cap on top or side of the handle. This design choice keeps the aesthetic clean but can pose a challenge when it comes to shower handle removal. But with the right tools and a bit of patience, you can master the art of shower handle removal without screws.
Why Remove a Shower Handle?
Ah, the age-old question: why would one want to embark on the journey of shower handle removal, especially when there are no visible screws? Well, my friend, there are several compelling reasons, and I’m here to walk you through each one. Whether you’re dealing with a pesky leakage or simply want to give your shower faucet a fresh look, understanding the “why” can make the “how” a lot smoother.
Addressing Leakage or Dirty Filters
One of the most common reasons for shower handle removal is to address leakage. A constant drip, drip, drip can not only be annoying but can also lead to increased water bills. Often, the culprit behind such leakage is dirty filters. Over time, these filters can become clogged with mineral deposits and other debris, affecting the flow of water and causing leaks. By removing the handle, you can access these filters, give them a good cleaning, or replace them if necessary.
Replacing Faulty or Broken Shower Handles
Let’s face it; nothing lasts forever. Even the sturdiest of shower handles, be it the classic knob handles or the modern lever-style handles, can wear out or break. If you’ve noticed that your Moen shower handle keeps breaking or if the handle mechanism isn’t functioning as it should, it might be time for a replacement. And to replace, you first need to remove.
Changing the Faucet Cartridge for Better Water Flow

The faucet cartridge plays a crucial role in regulating the flow of water. If you’ve been experiencing inconsistent water flow or if the water doesn’t turn off completely, it might be time to replace the faucet cartridge. And guess what? To get to that cartridge, you’ll need to embark on the adventure of shower handle removal.
Addressing Leaks and Damaged Filters
Leaks can be quite the nemesis. Not only do they waste water, but they can also lead to other issues like rust and mineral buildup. Similarly, damaged filters can compromise the quality of the water you’re bathing in. By removing the shower handle, you can inspect for any leaks, check the state of your filters, and make the necessary replacements or repairs.
Cleaning and Removing Mineral Deposits
Over time, mineral deposits can accumulate on your shower handle, especially if you live in an area with hard water. These deposits can affect the functionality of the handle and also mar its appearance. By removing the handle, you can give it a thorough cleaning, perhaps with some CLR cleaner, and ensure it looks and works as good as new.
A Step-by-Step Guide to Shower Handle Removal:
- Turn Off the Water Supply: Always start by turning off the water supply. Safety first!
- Locate the Hidden Screw: Remember that button or cap on top or side of the handle? Gently pop it out to reveal the hidden screw.
- Unscrew and Remove: Using your trusty Philip head screwdriver or Allen wrench (7/64 for some models), unscrew and then gently take off the handle.
- Inspect and Clean: Check for any signs of wear and tear, clean off any mineral deposits, and make any necessary replacements or repairs.
Types of Shower Handles
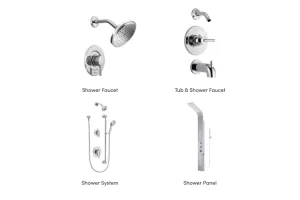
Before diving into the nitty-gritty of shower handle removal, it’s essential to familiarize yourself with the different shower handle designs. Just like shoes come in various styles and purposes, so do shower handles. Each type has its unique features, aesthetics, and mechanisms. By understanding these, you’ll be better equipped to tackle the task of removing them, especially when there are no visible screws in sight.
Knob Handles: The Most Common Type, Similar to a Door Knob
Ah, the classic knob handles! These are the most common types you’ll find in many homes. They’re straightforward, easy to use, and resemble a regular door knob. To adjust the flow of water or its temperature, you simply twist the handle left or right.
Key Features:
- Simple and intuitive design.
- Often used in single unit shower handles.
- Can be found in both modern single-unit Moen showers and older designs.
Lever Handles: Move Up and Down to Control Water Flow, with Some Having Temperature Control Features
Lever handles bring a touch of modernity to your shower. They move up and down, controlling the flow of water. Some advanced lever-style handles even come with temperature control features, allowing you to get that perfect warm shower without any fuss.
Key Features:
- Sleek and modern design.
- Common in modern shower faucets.
- Offers precise control over water flow and temperature.
Cross Handles: X-Shaped Handles That Are Less Common but Offer a Vintage Feel
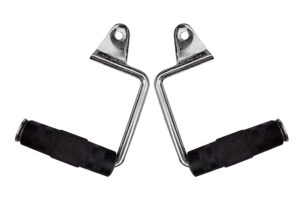
For those who love a touch of vintage charm in their bathrooms, cross handles are the way to go. These X-shaped handles might be less common, but they sure do make a statement. They’re reminiscent of old-world charm and can be a centerpiece in a vintage-themed bathroom.
Key Features:
- Unique X-shaped design.
- Often found in designer handles or vintage bathrooms.
- Provides a distinct aesthetic appeal.
Shower Handle Removal: A Quick Overview
No matter the type of handle you have, the process of shower handle removal remains somewhat consistent. Here’s a brief rundown:
- Turn Off the Water Supply: Always, always start by turning off the water supply.
- Locate the Hidden Mechanism: Whether it’s a button or cap on top or side of the handle, gently pop it out to reveal the hidden screw or set screw.
- Unscrew and Remove: Using tools like a Philip screwdriver or an Allen wrench (7/64 for some models), carefully remove the screw. Then, gently take off the handle.
- Inspect and Clean: Once off, inspect for any signs of wear, leakage, or mineral deposits. Clean or replace as necessary.
Essential Tools for Shower Handle Removal
Before you embark on the journey of shower handle removal, especially when there are no visible screws, it’s crucial to gather the right tools. Just as a chef needs their knives and pans, a DIY plumber requires specific tools to ensure the job is done efficiently and safely.
Flat Screwdriver
This is your go-to tool for prying off caps or buttons that hide the screws on many shower handles. It’s versatile and a must-have in any toolkit.
Allen Wrench
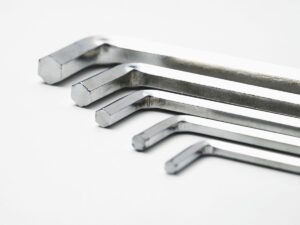
Specifically, the 7/64 Allen wrench is often used for many modern shower handles, especially the lever-style handles. It’s designed to fit into small hex screws that hold the handle in place.
Old Cloth
An old cloth or towel is handy for cleaning any mineral deposits or rust. It’s also useful to grip the handle when trying to twist or pull it off, ensuring you don’t leave any scratches.
Rust & Corrosion Cleaner
Over time, shower handles can accumulate rust and mineral deposits, especially if you have hard water. A good rust & corrosion cleaner, like CLR, can help break down these deposits, making the removal process smoother.
Pliers
For those stubborn handles that refuse to budge, a pair of pliers can provide the extra grip and leverage you need. They’re also handy for removing any hex screws if you don’t have an Allen wrench on hand.
Step-by-Step Guide to Removing Shower Handles
Now that you’re armed with the right tools, let’s dive into the step-by-step process of removing different types of shower handles.
Single Shower Handle Without Screws
Locating and Removing the Cap or Button
Use your flat screwdriver to gently pop out the cap or button on top or side of the handle. This will reveal the hidden screw or set screw.
Turning Off the Water Supply
Before proceeding, always turn off the water supply to prevent any unexpected sprays or leaks.
Revealing and Removing the Screw
With the cap or button removed, you’ll see the screw holding the handle in place. Depending on the design, you might need a Philip screwdriver or an Allen wrench to remove it.
Gently Pulling Out the Handle
Once the screw is out, gently pull or twist the handle to remove it. If it’s stuck, wrap it with an old cloth for a better grip and use pliers if necessary.
Double Faucet Handles Without Screws
Turning Off the Water Supply
As always, start by turning off the water supply.
Twisting the Handle’s Base
For double faucet handles, you often need to twist the base of the handle to reveal the cartridge or the screw set holding it in place.
Unscrewing and Accessing the Cartridge
Once revealed, use the appropriate tool to unscrew and access the cartridge. This might be a hex screw or a standard unit.
Lever Style Faucet Handle Removal
Removing the Hot and Cold Buttons
Most lever-style handles have hot and cold buttons. Use your flat screwdriver to gently pop these off.
Using an Allen Wrench to Remove the Allen Key
Beneath the buttons, you’ll often find an Allen key. Use your Allen wrench to remove this.
Pulling Out the Handle to Access the Cartridge
With the Allen key removed, you can now pull out the handle, giving you access to the cartridge and any other parts that might need cleaning or replacing.
Pro Tips and Tricks for Shower Handle Removal
Embarking on the journey of shower handle removal? Well, every experienced plumber has a few tricks up their sleeve, and I’m here to share some of those with you. These tips can make the process smoother and ensure you get the best results.
Cleaning Mineral Deposits Using Lemon or Distilled White Vinegar
Over time, mineral deposits can accumulate on your shower handle, especially in areas with hard water. Before you start the removal process, it’s a good idea to give your handle a good clean.
Cut a lemon in half and rub it over the handle. The citric acid will help break down the deposits. Alternatively, soak a cloth in distilled white vinegar and wrap it around the handle for an hour. The vinegar will dissolve the mineral deposits, making the handle easier to remove.
Checking the Brand’s Website for Specific Removal Instructions
Different shower handle designs might have unique mechanisms. Before you start, check the brand’s website (like Moen shower handle) for any specific instructions or product manuals. This can save you a lot of time and prevent potential damage.
Ensuring Screws and Components are Kept Safely to Avoid Loss
When removing the handle, especially if there are no visible screws, you’ll come across various small components.
Keep a tray or bowl nearby to place these components safely. Label them if possible. This will make the reassembling process much more straightforward.
Conclusion
The Importance of Understanding the Type of Shower Handle Before Removal
Every shower handle, be it knob handles, lever handles, or cross handles, has its unique quirks. Understanding the type you’re dealing with can make the removal process much smoother and prevent potential damage.
The Ease of Removal with the Right Tools and Techniques
With the right tools, like a flat screwdriver or an Allen wrench, and the correct techniques, shower handle removal can be a breeze. Always ensure you’ve turned off the water supply and take your time to avoid any mishaps.
Encouraging Regular Maintenance for Long-Lasting Shower Handles
Regular maintenance, like cleaning mineral deposits and checking for leakage, can prolong the life of your shower handle. It can also make the removal process easier when the time comes.
Frequently Asked Questions
Q: How to Clean Mineral Deposits in the Faucet Handle?
A: Mineral deposits can be cleaned using lemon or distilled white vinegar. Regular cleaning can prevent buildup and ensure smooth operation.
Q: Tools to Pull Out a Hard Shower Handle?
A: For stubborn handles, tools like pliers, a faucet handle puller, or an Allen wrench can be handy. Always ensure you’re using the right tool for the job to prevent damage.
Q: The Role of the Faucet Cartridge in Controlling Water Flow?
A: The faucet cartridge regulates the flow of water and its temperature. If you’re experiencing issues with water flow, it might be time to check or replace the cartridge.
Q: Proper Method to Remove the Base of a Double Faucet Handle?
A: For double faucet handles, twist the base of the handle to reveal the cartridge or the screw set holding it in place. Once revealed, use the appropriate tool to unscrew and access the cartridge.
