Introduction
Ah, the joy of a refreshing shower! But what happens when the water doesn’t flow the way it should? Enter the shower diverter, the unsung hero of our bathroom plumbing. This nifty device directs water from the faucet to the showerhead, ensuring you get that cascading waterfall effect every time you step into the tub. But like all things, it can face wear and tear. In this guide, we’ll delve into how to fix a shower diverter, ensuring you can enjoy your showers without a hitch.
A brief overview of the importance of a functional shower diverter
The shower diverter is not just a piece of metal; it’s the gatekeeper of your shower experience. When functioning correctly, it ensures that water flows seamlessly from the bathtub faucet to the showerhead. A broken shower diverter can lead to leaks from the bathtub, water wastage, and a less-than-ideal shower experience. It’s not just about fixing a shower; it’s about ensuring your comfort and the health of your plumbing system.
Common issues leading to a shower diverter not working

- Wear and Tear: Like all things, the shower diverter mechanism can wear out over time. Regular use, water pressure, and mineral build-up can lead to its deterioration.
- Mechanical Failures: The diverter valve control mechanism, whether it’s a rubber valve activation or a metal pin control, can face mechanical breakdowns.
- Corrosion Issues: Rusty water or metal corrosion can be a sign that your shower diverter is facing corrosion issues. This is often due to water quality and the age of the plumbing.
- Water Pressure Issues: If the water redirection isn’t smooth, it might be a sign that there’s a water back pressure problem or blockage affecting the shower diverter device.
Understanding the Shower Diverter Mechanism

What a shower diverter is and how it functions.
A shower diverter is a valve that directs water either to your showerhead or your bathtub faucet. When you lift or turn the diverter, it blocks water flow to the tub and redirects it upwards to the showerhead. It’s a simple yet ingenious device that ensures you don’t end up with a flooded bathroom floor every time you want a shower.
Different types of shower diverters and their unique characteristics.
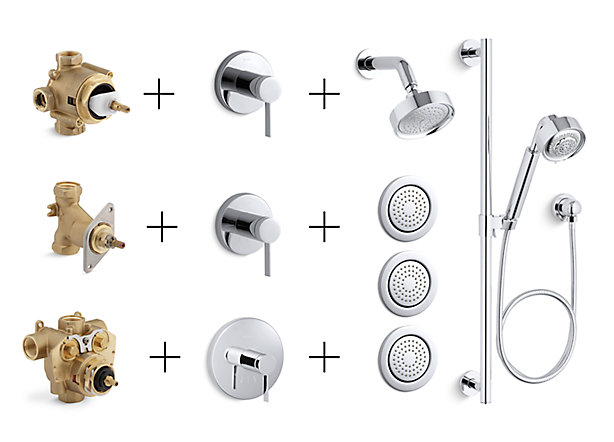
- Single Valve or Tee-Diverter: This is the most common type. Located in the tub spout, you pull up the knob to activate the shower.
- Two-Valve Diverter: Found in showers with two faucet handles. Turn the handle to switch between the tub and shower.
- Three-Valve Diverter: Used in showers with separate hot and cold handles. The third handle in the middle controls the diverter.
Common Signs Your Shower Diverter is Not Working
Water leakage from the tub spout during a shower.
If you notice water dripping or pouring from the tub spout when the shower’s on, it’s a clear sign your shower diverter is not working correctly. This can lead to water wastage and a less-than-satisfactory shower experience.
Inability to switch between the showerhead and tub faucet.
If you can’t switch the water flow between the showerhead and the tub, your diverter might be broken or worn out.
Unusual noises when operating the diverter.
Hearing strange sounds when using the diverter? It could be due to wear and tear, corrosion issues, or a mechanical breakdown in the diverter valve control mechanism.
Steps to Diagnose a Malfunctioning Shower Diverter
Visual inspection for obvious damages.
Start by checking the diverter for visible signs of damage. Look for cracks, wear, or mineral build-up.
Testing water flow and switch mechanism.
Turn on the water and operate the diverter. If the water doesn’t switch between the tub and shower or if there’s a significant drop in water pressure, there might be an issue.
Identifying the type of diverter and its specific issues.
Different diverters have different common problems. For instance, a tee valve shower diverter might face issues with its pin knob, while a three-valve diverter might have problems with its triple-handle assembly.
Shower Diverter Repair: Step-by-Step Guide
Tools and materials needed for the repair.
Before we start, ensure you have the following tools and materials on hand:
- Adjustable wrench
- Screwdriver (both flat-head and Phillips)
- Plumber’s tape
- Replacement parts (if needed)
- Cloth or rag
- Diverter replacement kit (for those pesky worn-out parts)
Turning off the water supply.
Safety first! Before you start tinkering:
Locate the main water valve in your home. Turn it off to ensure no water flows while you’re working. This step is crucial to avoid any unexpected water gushes or, worse, a mini indoor flood.
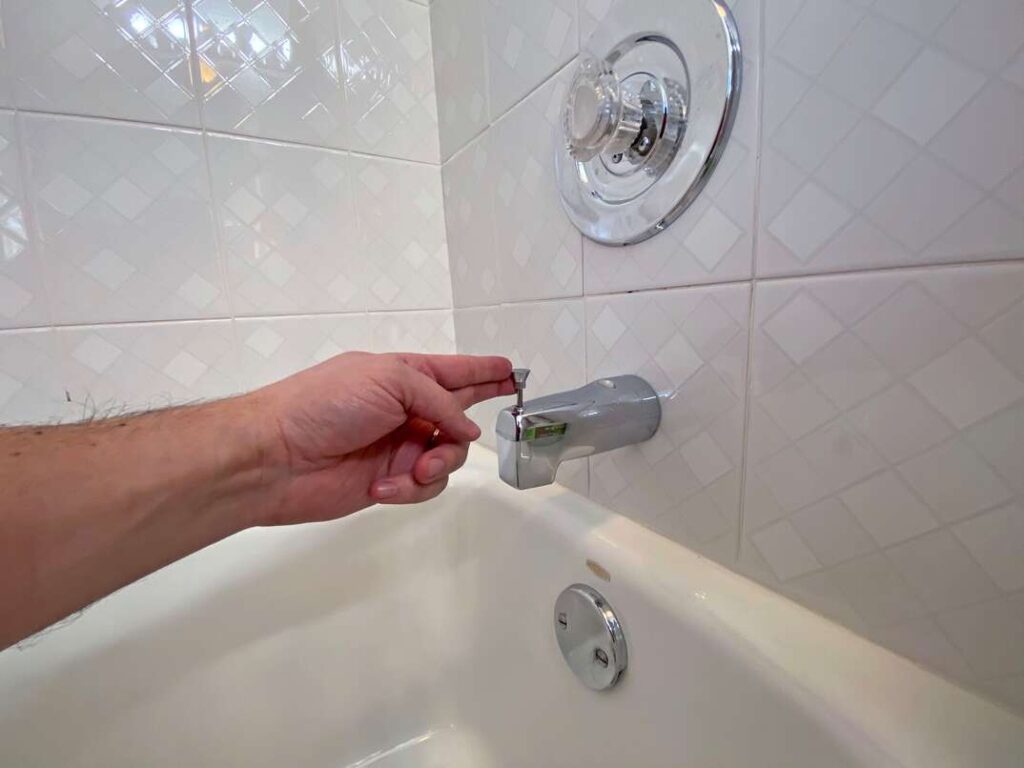
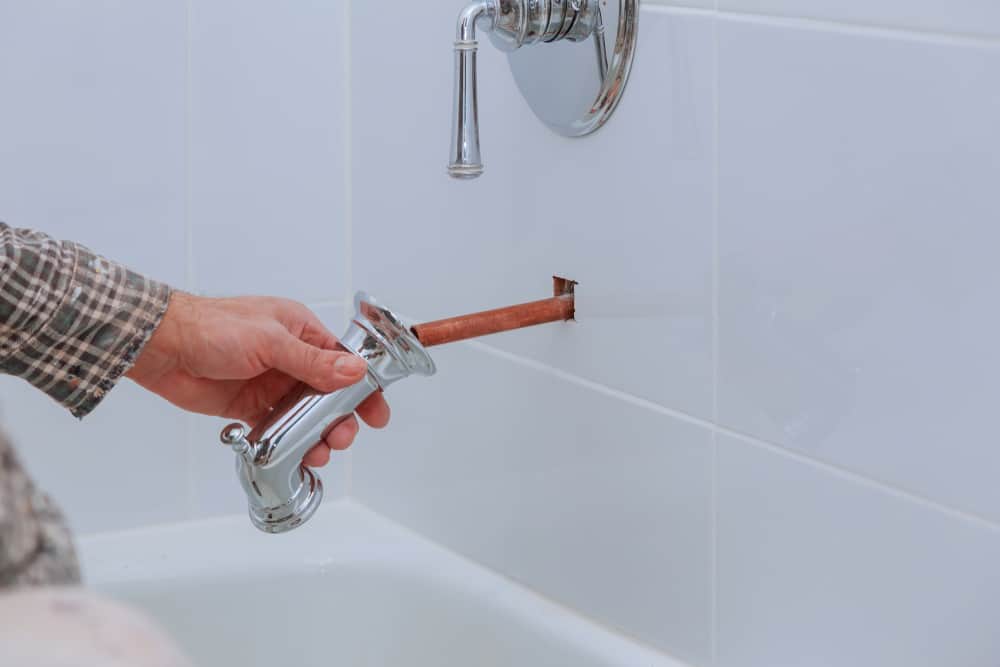
Removing the diverter handle or knob.
Using your screwdriver, remove any small screws holding the handle or knob in place. Gently pull or unscrew the threaded tub spout or pin knob to access the diverter valve.
Checking and cleaning the diverter valve.

Now that you’ve got a clear view:
Inspect the shower diverter valve for any signs of wear and tear or mineral build-up. Clean any debris or build-up using your cloth or rag. Sometimes, a simple cleaning can solve the issue without needing any replacements.
Replacing worn-out or damaged parts.
If cleaning didn’t do the trick:
Check the diverter cartridge and other parts for damage. Use your diverter replacement kit to replace any worn-out or broken parts. Ensure you’re using the correct parts for your specific type of diverter.
Reassembling and testing the diverter.
Once you’ve replaced the necessary parts, reassemble the handle or knob. Turn the water supply back on and test the diverter. Switch between the bathtub faucet and the showerhead to ensure water flows correctly.
When to Opt for Shower Diverter Replacement
Hey there, DIY enthusiast! If you’ve been battling with your shower diverter and it seems like a never-ending saga, perhaps it’s time to consider a replacement. Let’s delve into the signs that indicate your diverter might be past its prime and the benefits of getting a new one.
Signs that your diverter is beyond repair.
- Persistent Leaks: If water continues to leak from the bathtub faucet even after multiple repair attempts, it’s a clear sign.
- Difficulty in Operation: Struggling to turn or pull the diverter? It might be worn out.
- Rusty Water: If rust-colored water starts flowing when you activate the diverter, there could be metal corrosion inside.
Benefits of replacing an old or damaged diverter.
- Improved Water Flow: A new diverter ensures optimal water redirection between the showerhead and bathtub faucet.
- Water Conservation: No more wastage due to leaks from the bathtub or drippy shower problems.
- Enhanced Shower Experience: With a functional diverter, you can enjoy your showers without any hitches.
Choosing the right replacement for your shower system.
- Know Your Type: Whether it’s a single-valve, two-valve, or three-valve diverter, ensure you get the right match.
- Quality Matters: Opt for reputable brands like RepipeFItting
- Seek Expert Advice: If unsure, consult with licensed plumbing technicians to get the best fit for your system.
Tips for Preventing Shower Diverter Issues
Maintenance is key! A little care can go a long way in ensuring your shower diverter remains in tip-top shape.
Regular maintenance and cleaning.
Avoid Mineral Build-up: Clean the diverter regularly to prevent mineral deposits which can hamper its function. Check for Wear and Tear: Periodic checks can help spot issues before they escalate.
Avoiding forceful operation.
Gentle Handling: Avoid forcefully turning or pulling the diverter control handle. Educate Others: Ensure all household members know the right way to operate it.
Periodic checks for wear and tear.
- Inspect Regularly: Look out for signs like water flow blockage or unusual noises.
- Replace Small Parts: Sometimes, replacing small screws or a worn-out rubber gasket can prolong the diverter’s life.
Conclusion
As we wrap up this comprehensive guide on how to fix a shower diverter, it’s essential to understand the pivotal role this small device plays in our daily lives. A well-functioning shower diverter ensures that our showers are not just about hygiene but also about relaxation and rejuvenation.
Recap of the importance of a well-functioning shower diverter.
- Efficient Water Redirection: A good diverter ensures seamless switching between the bathtub faucet and the showerhead, providing you with the desired water flow.
- Conservation of Water: With no leaks from the bathtub or any drippy shower problems, you save a significant amount of water.
- Enhanced Shower Experience: No unexpected cold splashes or sudden water pressure drops – just a smooth, consistent flow for a refreshing shower.
Doing timely repair or replacement to ensure a pleasant showering experience.
Don’t let a faulty shower diverter dampen your spirits or disrupt your daily routine. Whether it’s wear and tear, mineral build-up, or mechanical failures, addressing the issue promptly can save you from bigger hassles down the line. And remember, while DIY solutions can be gratifying, there’s no harm in seeking expert advice or services from licensed plumbing technicians, especially for complex issues.
FAQs:
What is the average lifespan of a shower diverter?
A: A typical shower diverter can last anywhere between 10 to 15 years, depending on its quality, usage, and maintenance. Regular checks and timely repairs can extend its lifespan.
Can I repair a shower diverter on my own or should I call a professional?
A: While minor issues like cleaning mineral deposits or tightening screws can be handled with a DIY approach, more complex problems might require professional expertise. If you’re unsure, it’s always best to consult with plumbing technicians.
How much does a typical shower diverter replacement cost?
A: The cost can vary based on the type of diverter, brand, and labor charges. On average, a replacement can range from $20 to $150 for the part, with labor costs adding another $50 to $150.