Are you tired of dealing with slow drains and unpleasant odors in your home? This step-by-step approach is designed for beginners, and by the end, you’ll have a clear understanding of how to maintain a clean and efficient P-Trap.

Step 1 – Gather Supplies
Gather all the supplies you’ll need to clean the P-trap without removing it. Here’s what you’ll need:
Rubber Gloves
Wearing rubber gloves will protect your hands from any dirt or residue in the P-Trap.
Bucket
You’ll need a bucket to catch any water or debris that may come out during the cleaning process.
Pipe Brush
A pipe brush is essential for scrubbing the inside of the P-Trap thoroughly.
Cleaning Solution
Choose a mild cleaning solution, such as a mixture of water and dish soap or a specialized pipe cleaner.
Wrench
You may need a wrench to help loosen any stubborn connections if necessary.
Step 2 – Safety Precautions
Safety is paramount in any plumbing task. Here are two key precautions:
Wear gloves

Always wear rubber gloves to protect your hands from potential contaminants in the P-Trap.
Ventilate the area.
Ensure proper ventilation by opening windows or using a fan to disperse any fumes from cleaning solutions.
Step 3 – Prepare the Area
Preparing the workspace is crucial to keep the process smooth and tidy.
Clear Under-Sink Area
Remove any items stored under the sink to provide easy access to the P-Trap.
Place Bucket

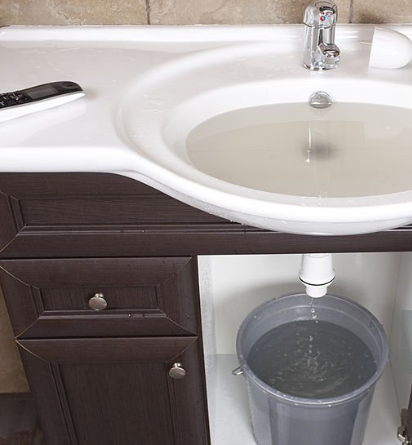
Position the bucket beneath the P-Trap to catch any water or debris that might spill during cleaning.
Keep Towels Handy
Have towels nearby to wipe up any spills or drips.
Turn Off Water Supply
Locate and turn off the water supply valve to prevent any accidental water flow during the process.
Step 4 – Locate and Identify P-Trap
It’s essential to know where and how to identify the P-Trap.
Underneath the Sink
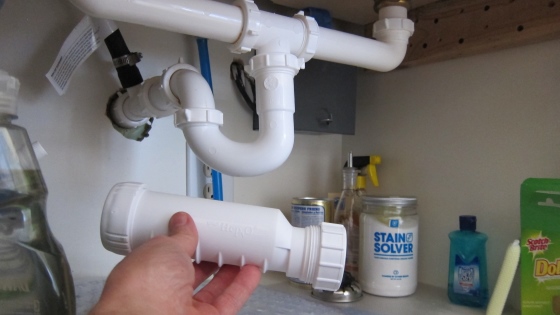
The P-Trap is a curved pipe located underneath the sink, usually beneath the drain.
Recognize Inlet and Outlet
Identify which side of the P-Trap is the inlet (where water flows in) and the outlet (where it drains out).
Step 5 – Remove Obstructions
Now, let’s remove any obstructions within the P-Trap.
Empty P-Trap Contents
Carefully unscrew and remove the P-Trap from the inlet and outlet pipes. Empty any water and debris into the bucket.
Check for Blockages

Inspect the P-Trap for blockages. Remove any visible debris or clogs by hand or using a tool.
Remove Debris
If necessary, use a pipe brush to reach inside the P-Trap and dislodge any stubborn debris.
Step 6 – Cleaning the P-Trap
With the obstructions gone, it’s time to clean the P-Trap thoroughly.
Using a Pipe Brush
Insert the pipe brush into the P-Trap and scrub the interior surfaces to remove any remaining residue.
Apply Cleaning Solution
Pour your chosen cleaning solution into the P-Trap and let it sit for a few minutes to dissolve any remaining grime.
Scrub Thoroughly
Use the pipe brush again to scrub the P-Trap’s interior while the cleaning solution is still present.
Rinse
Flush the P-Trap with warm water to rinse away the cleaning solution and loosened debris.
Step 7 – Reassemble P-Trap
Now that the P-Trap is clean, it’s time to put it back together.
Place Back Inlet and Outlet
Carefully reattach the P-Trap to the inlet and outlet pipes, ensuring a secure fit.
Hand-Tighten Joints
Use your hands to tighten the connections. Avoid over-tightening, as it may damage the pipes.
Check for Leaks
Turn on the water supply and check for any leaks at the joints. If you notice any leaks, tighten the connections a bit more.
Step 8 – Test Drain

To ensure everything is working correctly, perform a drain test.
Turn On Water Supply
Turn the water supply back on.
Check for Leaks Again
Inspect the connections for leaks once more, especially as water flows through the P-Trap.
Test Drain Flow
Run water down the drain to confirm that it’s draining smoothly without any unusual noises or slow flow.
Prevention of Future Clogs
To prevent future clogs and maintain a clean P-Trap, consider the following:
Proper disposal of items
Educate yourself and your household members on what can and cannot be disposed of down the drain.
Frequent inspections
Regularly inspect the P-Trap for any signs of blockages or leaks.
Regular maintenance schedule
Establish a maintenance schedule to clean the P-Trap at least once or twice a year, even if there are no issues.
Install drain protectors.
Use drain protectors or strainers to catch debris and prevent it from entering the P-Trap.
By following these steps and practicing preventative measures, you can maintain a clean and efficient P-Trap without the need for removal, ensuring your plumbing system stays in excellent condition for years to come.
Benefits of a Clean and Well-Maintained P-Trap
Now that you’ve learned how to clean your P-Trap effectively, let’s explore the benefits of keeping it in excellent condition.
- Prevents Clogs: A clean P-Trap is less likely to trap debris and cause clogs, keeping your drains flowing smoothly.
- Reduces Odors: Accumulated gunk in the P-Trap can emit unpleasant odors. Regular cleaning helps maintain a fresh-smelling sink.
- Prevents Mold Growth: Standing water in a clogged P-Trap can promote mold growth. Cleaning it regularly eliminates this risk.
- Avoids Costly Repairs: Neglecting your P-Trap can lead to costly plumbing repairs. Regular maintenance saves you money in the long run.
- Preserves Water Efficiency: A clean P-Trap ensures that water drains efficiently, reducing water wastage.
- Improves Air Quality: Mold and bacteria in a dirty P-Trap can negatively impact indoor air quality. Cleaning it improves the air you breathe.
- Prolongs Fixture Lifespan: Well-maintained plumbing fixtures last longer, saving you from premature replacements.
Conclusion
In conclusion, keeping your P-Trap clean and well-maintained has numerous benefits for your home, health, and wallet. Regular cleaning and preventive measures are the keys to reaping these rewards.
Frequently Asked Questions (FAQs)
Let’s address some common questions you might have about P-Traps and their maintenance.
How often should I clean the P-Trap?
It’s recommended to clean the P-Trap once every six months to a year, depending on usage. If you notice slow drainage or unpleasant odors, consider cleaning it more frequently.
Can I use bleach to clean the P-Trap?
Avoid using bleach or harsh chemicals, as they can damage the P-Trap and harm the environment. Stick to mild cleaning solutions like water and dish soap or specialized pipe cleaners.
What if the clog persists after cleaning?
If a clog persists after cleaning the P-Trap, it may be further down the drain. Consider using a plumber’s snake or seeking professional help.
When is it absolutely necessary to remove the P-Trap?
You should only remove the P-Trap if cleaning it in place isn’t effective or if you suspect a more significant issue within your plumbing system. Removing the P-Trap should be a last resort.
Are there any alternatives to the P-Trap?
The P-Trap is a standard plumbing component due to its effectiveness in preventing sewer gases from entering your home. While there are alternative designs, they serve the same purpose, and the P-Trap remains the most commonly used option.

